
A Look At ShareX
Today I decided to learn more about the screenshot utility ShareX. I installed this tool on my laptop more than a year ago, but never really bothered to explore its features and configure it in more detail until now.
ShareX's power lies in its customizable workflow. It not only takes screenshots - it can then automatically edit, save and process them in a wide variety of ways.
Lets look at what's possible.
The Power of ShareX
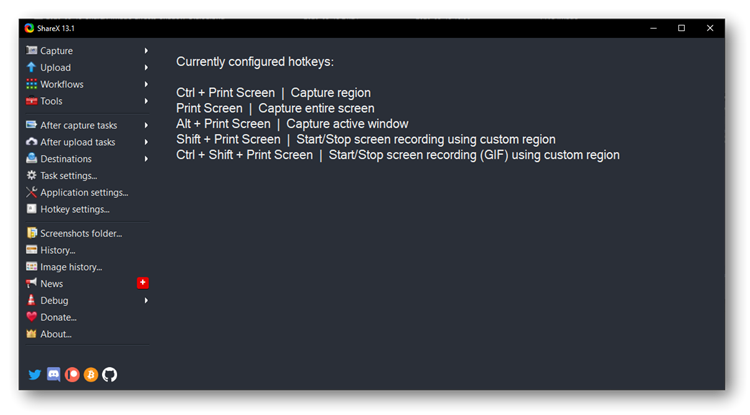
ShareX allows me to configure a screen capture workflow, using tasks including:
- Capture: capture the full screen, a window, or a small region. You can also take video recordings of screen activity and even use OCR to capture text.
- After capture tasks: add a watermark or image effects to the captured image, edit it, print it or save it to the clipboard for pasting it directly into a document.
- Upload: Automatically upload the image to a wide variety of websites including Dropbox, Twitter and Imgur.
- After upload tasks: The most useful task in this section is the ability to copy the image URL to the clipboard, so you can paste it into an online post or a web site update.
Each task can be configured in a variety of ways, and I can configure multiple workflows, each with a different combination of tasks. Each workflow can be easily triggered with a Hotkey.
Configuring ShareX
With any utility or application, there are always a few default settings that I just disagree with. After playing for a while, I ended up changing the following settings.
Screenshots folder
ShareX normally saves data to a folder %UserProfile%\Documents\ShareX. I
don't mind saving log files and workflow settings to that location, but I
would prefer screenshots to be saved to the standard Pictures folder,
specifically to the %UserProfile\Pictures\Screenshots folder used by Windows
itself. That makes screenshot images easier to find from other applications.
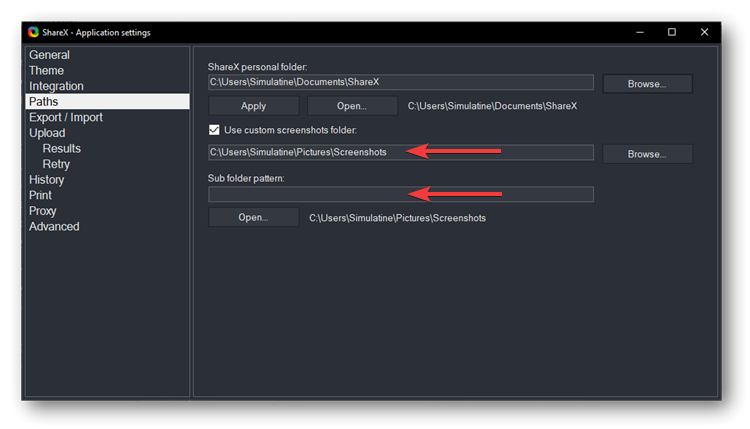
I configured this by going to Paths tab in Application settings. I
enabled the Use custom screenshots folder checkbox and entered my Picture
folder C:\Users\Simulatine\Pictures\Screenshots.
ScreenX also creates subfolders for each year and month. I disabled this, so
that all screenshots are saved directly to the Screenshots folder, by removing
the %y-%mo pattern from the Sub folder pattern box.
Filenames
I also changed the default filename pattern. ScreenX saves the screenshot with
a random 10 character filename, such as q3TYN22tO2.png. I didn't want this!
Instead, I preferred the default filename to reflect the current date and time.
I can always override this default in individual workflows by enabling the
Save image to file as... task, which will allow me to specify a unique
filename after each capture.
To configure the filename, I went to the Upload\File naming tab in Task Settings.
In Name pattern for capture or clipboard upload, I entered
%y-%mo-%d_%h.%mi.%s. This ensured that screenshots are saved with a filename
using the current date and time, such as 2020-05-15_19.15.00.png.
Similarly, I changed Name pattern for window capture to
%pn_%y-%mo-%d_%h.%mi.%s. When I capture a specific application window, the
application name is now included in the filename, for example
chrome_2020-05-15_19.15.00.png
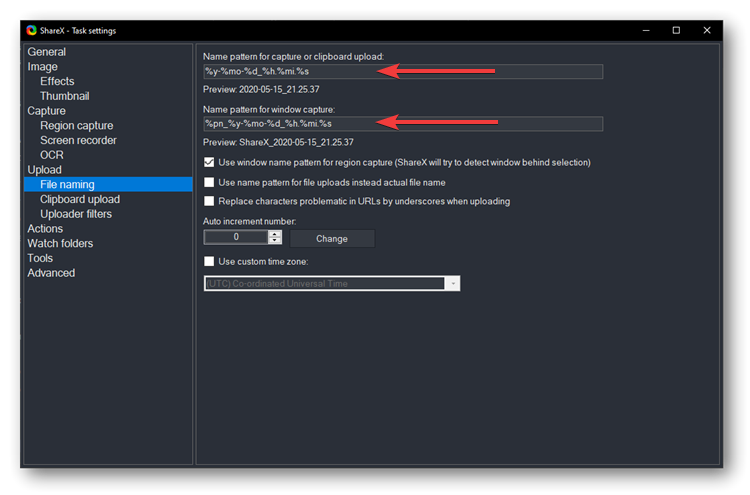
Image Effects
One of the powerful features of ShareX is its ability to process the screenshot image before saving it. I created two image effects which I can enable or disable in my workflows.
Image Resizing
I first wanted to include the ability to resize my screenshot captures. Displaying a full size screenshot in a web page is not always optimal, and using Markdown limits the control I have on dynamically resizing images in HTMl.
I therefore automatically resize my screenshots to be be no larger than 750 pixels in width.
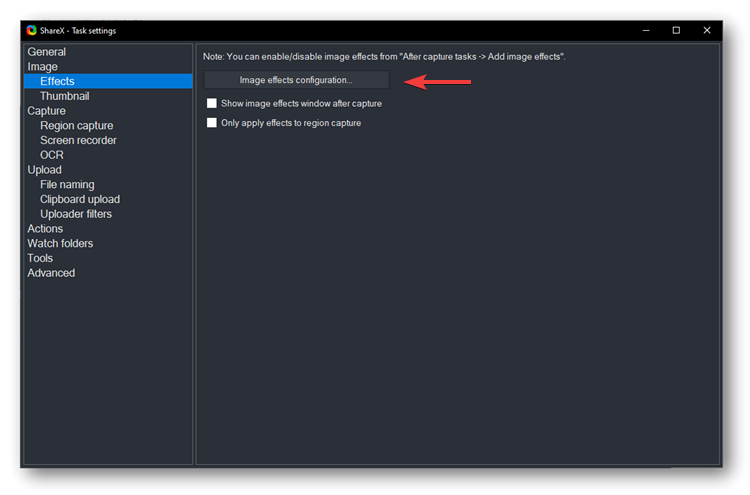
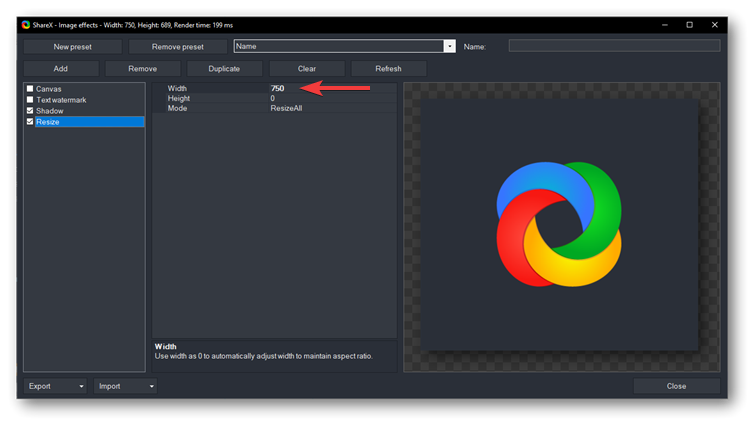
To configure this effect, I went to the Image\Effects tab in Task Settings, and clicked on the Image Effects configuration button.
I clicked on Add, and from the Manipulations submenu, selected the Resize effect. I set the Width to 400, and the Height to 0.
Drop Shadows
I also decided to add a drop shadow effect to images. This makes them stand off the screen.
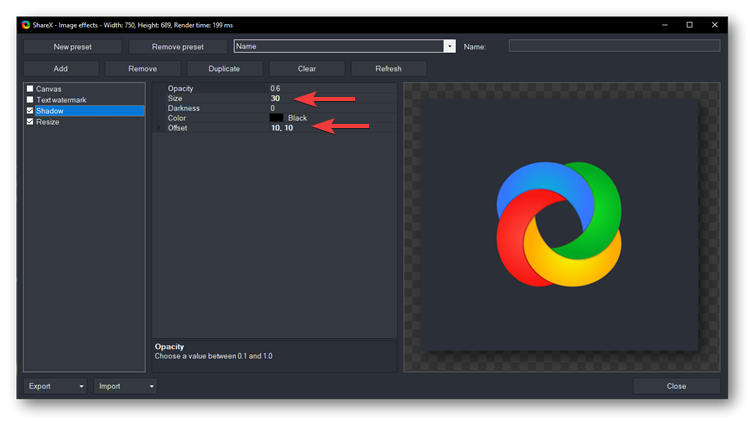
Again, in the Image\Effects tab in Task Settings, I opened Image effects configuration.
I clicked on Add, and this time from the Filter submenu, selected the Shadow effect. I changed the size from 10 to 30 to increase the effect, and also set the offset to 10 pixels in both the X and Y directions.
Configuring a Workflow
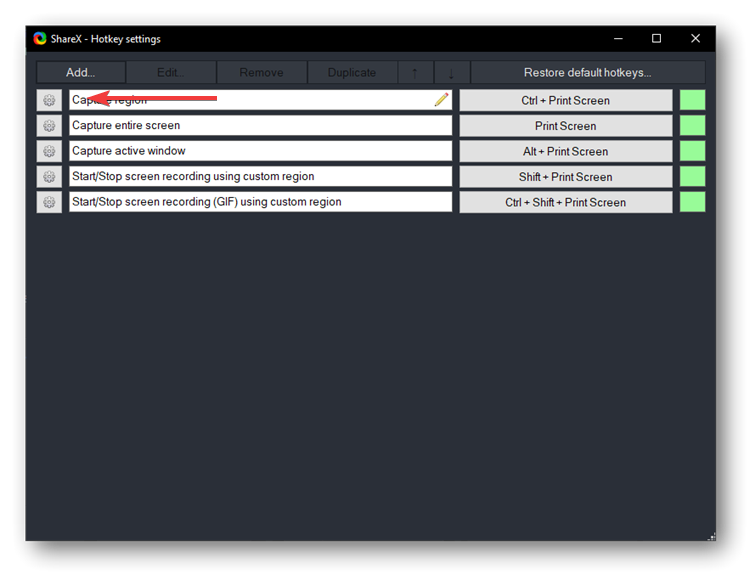
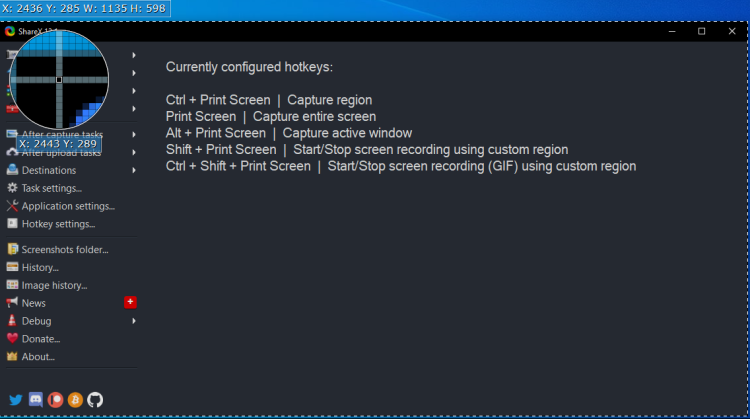
I could now bring several of these settings together into a single workflow. The workflow I most commonly use is Capture Region, which allows me to capture an entire window or application, or a portion of one. This is configured to use the Ctrl+Print Screen hotkey.
I went to Hotkey settings, where there were several pre-configured workflows, and clicked the gear icon to the left of Capture Region to configure this workflow.
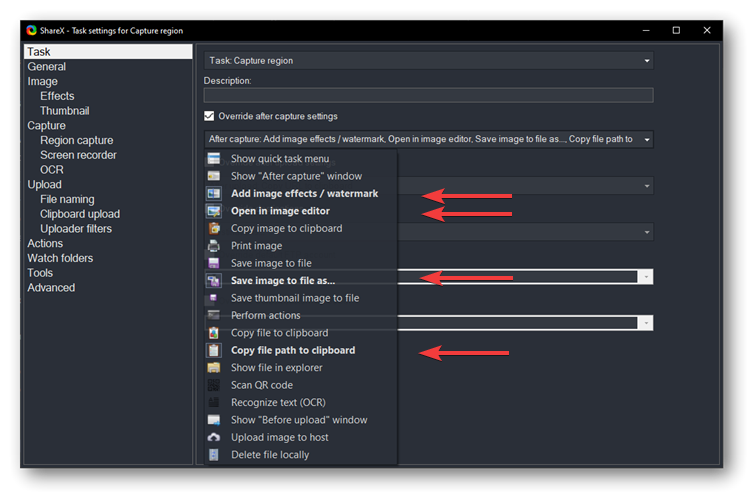
In the Task tab, I enabled Override after capture settings, and checked the following four tasks:
- Add image effects/watermark - this will resize the capture screenshot image to a maximum of 750 pixels wide and add the drop shadow effect - the two image effects I configured above.
- Open in image editor - allowing me to annotate the image, add arrows or highlight specific areas of interest.
- Save image to file as ... - so that I can give the file a proper name and save it to a target folder of my choice.
- Copy file path to clipboard - ready for me to paste into my Markdown blog post document.
Using the Workflow
I am now ready to go. Whenever I want to take a screenshot, I simply press the Ctrl+Print Screen key combination. This triggers ScreenX and displays an adjustable capture region on the screen. I can move and size this as I wish to capture the right window, dialog box or screen area.
I can select the target area, and click to capture. ShareX performs my image effects (resizing and adding a drop shadow), and opens the image in its image editor.
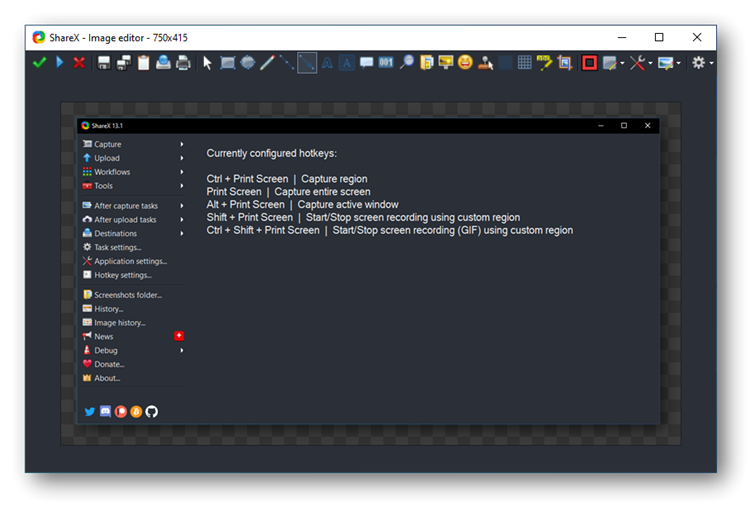
Here I can then add annotations, arrows (as seen in the screen shots on this page) or other highlights. Once I am happy, I can click the green check mark to save the screenshot.
This opens a save dialog, where I can rename the image and save it to my website image folder. Finally, Sharex copies the file location to the clipboard, ready for me to paste directly into an image link in my blog Markdown document:

The file location contains the full path, so I will need to adjust it slightly for web use:

Conclusion
Learning more about the power of ShareX has really helped me streamline my screen capture and blogging workflow.
Thanks to a ScreenX tutorial on Steemit.com and to a similar blog post on Jerrie Pelser.com, both of which I found very useful.